How to Iron On a Jersey Name and Number at Home (No Heat Press Needed)
By Patch FC Editorial Team · Last updated 2026-08-26 · Sources: Sportdecals, ProSoccer, Wooter
Yes — you can iron a name and number onto a soccer jersey at home with a regular household iron. The warning you keep seeing on nameset product pages ("professional heat press only, do not use a household iron") describes the ideal tool, not the only one. A heat press does three ordinary things — heat, pressure, time — perfectly evenly across the whole transfer. None of that is out of reach for a person with an iron, a hard table, and some patience. What you can't do at home is rush. This guide covers the method in general terms; for exact settings, always follow the instructions included with your specific sheet.
What's actually on a nameset sheet
A nameset is the full lettering kit for the back of a jersey, not a single decal. A typical sheet carries:
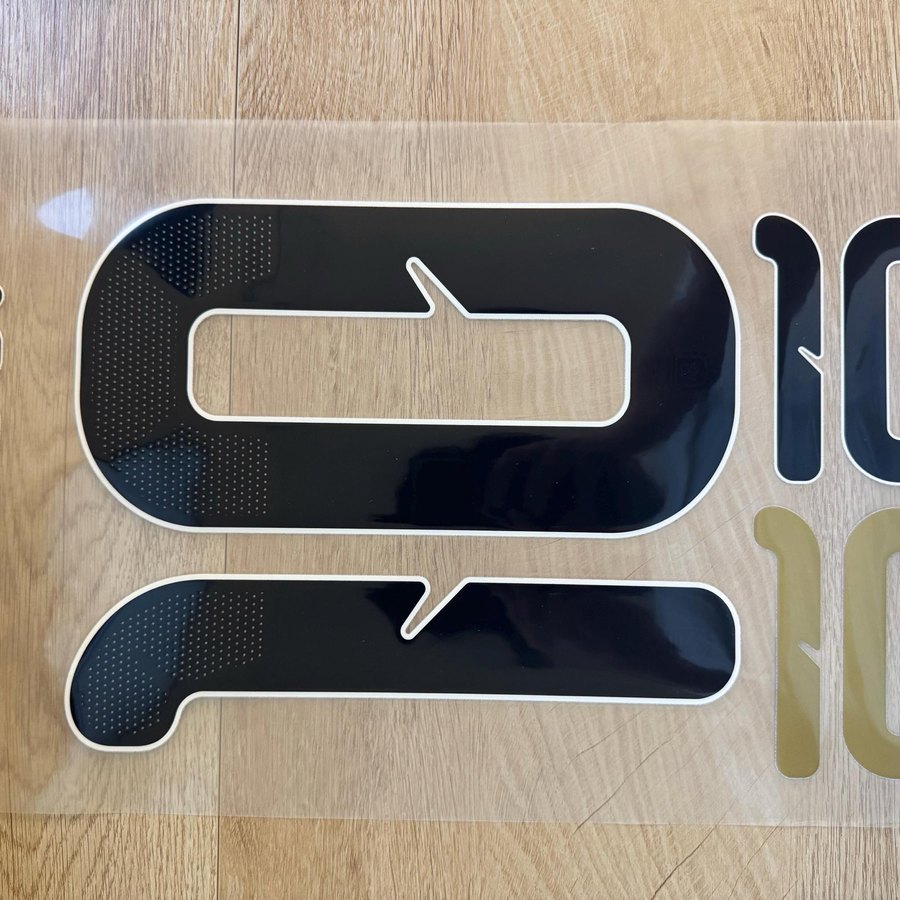
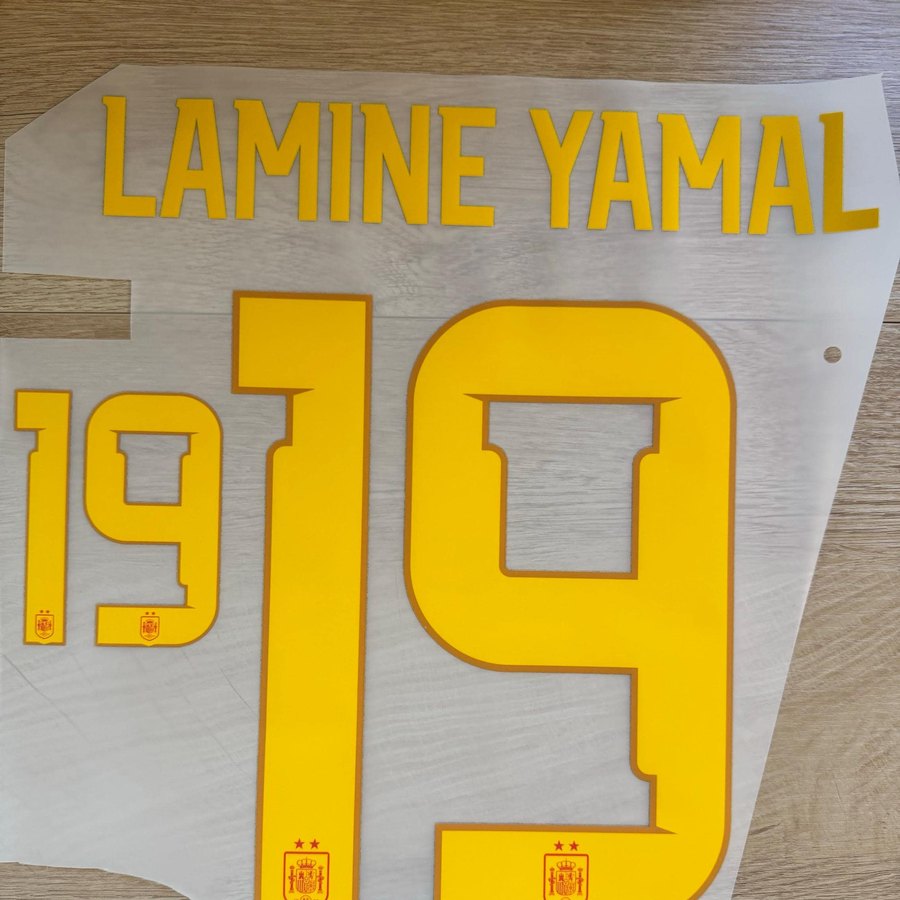
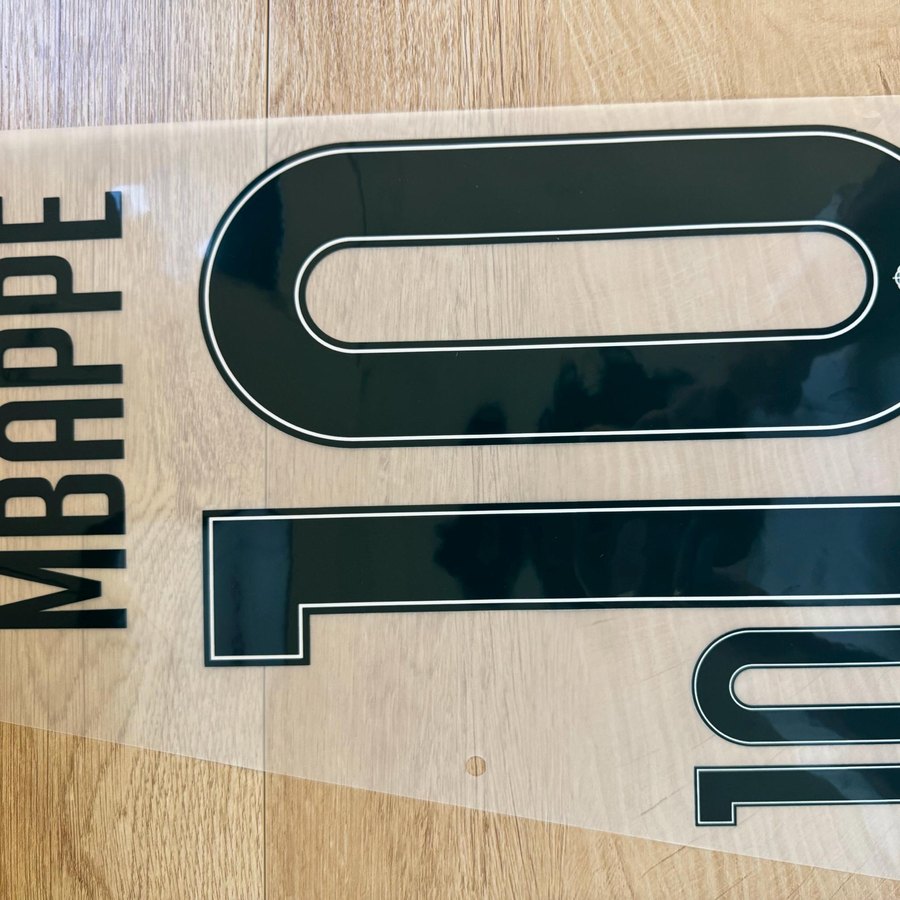
- The name — cut in lettering made for a specific shirt: MESSI in deep navy with a white outline for the light blue and white Argentina home shirt, MBAPPÉ in black for a white jersey, LAMINE YAMAL in yellow for the red Spain home shirt.
- The large number — the main number for the center of the back.
- Smaller extra numbers — most sheets include small versions of the number for the shorts or the sleeve, and the count varies by set. The Messi 10 Argentina home set carries two small shorts numbers, one gold and one navy; the Mbappé 10 black set includes two smaller 10s; its cream counterpart carries three in different sizes.
Everything arrives positioned on a clear transfer film. That film is not packaging — it holds the letters in their exact spacing while you work, and it only comes off at the end.
Namesets are also cut for a shirt color — navy lettering for a light shirt, cream for a dark one — so if you own the away kit, pick the set that matches that colorway.
Can you use a regular iron, or do you need a heat press?
The honest answer: heat press warnings exist because a press removes human error. It applies the same temperature and pressure to every square inch at once, for an exact amount of time. A household iron has hot spots, a smaller face, and a human on top of it.
So the rule this entire guide reduces to is this: the heat press isn't doing anything you can't do — it's doing it evenly. At home, your job is to be the evenness.
In practice, three substitutions:
- A firm surface replaces the press bed. A sturdy table protected with a folded towel works. A padded ironing board does not — the padding sinks under the iron and swallows the pressure the transfer needs.
- Firm, even, downward pressure replaces the press plate. Press straight down and hold. Don't scrub the iron back and forth — sliding shifts letters and heats unevenly. Lift, move, press again, overlapping sections so no zone gets missed.
- Patience replaces the timer. Work through the name and number unhurried, then leave everything alone to cool.
For the actual settings and timing, follow the instructions included with the sheet. Materials differ, and the manufacturer's card in the package outranks any general guide — including this one.
How do you line up the name and number on the back?
Heat is forgiving of a slow decision and unforgiving of a crooked one. Once a transfer bonds, it's bonded, so alignment deserves more time than the ironing itself:
- Lay the jersey flat on your firm surface, back up, and smooth it completely — a wrinkle under a letter becomes a permanent crease.
- Find the vertical center line. Fold the shirt gently in half lengthwise and crease the middle, or measure the midpoint between the side seams.
- Place the large number first, centered on that line in the upper-middle of the back, below the collar area. The number is the anchor.
- Set the name above the number. The film keeps the letters in their correct spacing, so treat name and number as blocks, not individual letters. On some sets the name arcs gently; the sheet's own cut shows the intended shape.
- Step back and look. Check it from across the room, then hold the shirt up by the shoulders the way it hangs on a body. A layout that looks fine flat can read tilted when worn.
Only when it passes the across-the-room test do you plug in the iron.
The trap: modern polyester punishes force
Modern jerseys are lightweight polyester — a fabric that performs beautifully on a pitch and reacts badly to careless heat. It's the real reason "heat press only" warnings exist, and the fix is not what instinct suggests.
When a corner doesn't seem to be sticking, instinct says push harder and crank the heat. That's backwards. The adhesive doesn't respond to violence; it responds to steady warmth, even pressure, and time. Patience does the bonding — force just risks the fabric.
The same patience applies after the ironing stops. Let everything cool completely before you touch the clear film. Peeling warm is where most home applications fail: the adhesive hasn't finished setting, and a letter that would have bonded perfectly lifts away with the film. Come back when the shirt is fully cool, peel slowly, and if an edge lifts, lay the film back down, press that spot again, and cool again.
Do iron-on numbers survive washing?
Yes — a properly applied nameset handles normal life fine, as long as the machine treats it like lettering, not like a stain. The routine is the same as for any ironed-on badge:
- Turn the jersey inside out before every wash, so the drum rubs fabric, not lettering.
- Wash gentle and cold. No aggressive cycles, no hot water.
- Skip the dryer entirely. Tumble heat is the enemy of the adhesive you just set — hang dry instead.
- Never run an iron directly across the finished numbers. If the shirt needs touch-ups later, work around the lettering or iron inside out.
Most washing casualties trace back to the dryer, not the wash.
One sheet, two shirts: the adult and kid detail
Doing a matching set for a parent and a kid? One sheet does double duty: the Lamine Yamal 19 Spain home nameset carries both sizes — adult and kid — on the same sheet, so a single set covers two shirts. The method doesn't change with the size: same firm surface, same centered layout, same full cool-down. Give the kid shirt the same care on alignment — a small back makes an off-center number more obvious, not less.
The same method, whatever the name on the back
That's the whole system. A household iron does the job when you supply the evenness a press automates; alignment happens slowly, before any heat; polyester rewards patience and punishes force; and the film comes off cold, never warm. Whether the back is going to read MESSI 10 in navy on the Argentina home kit, LAMINE YAMAL 19 in yellow for Spain, or MBAPPÉ 10 in black on a white jersey, the routine is identical — firm surface, even pressure, full cool-down, and the instructions that came in the package.
FAQ
Can you use a regular iron for jersey numbers?
Yes. A press applies even heat and pressure automatically; a household iron produces the same bond if you recreate those conditions — a firm surface, firm downward pressure in overlapping sections, and a full cool-down before removing the film. Follow the instructions included with your sheet.
Why do so many sellers say "heat press only"?
Because a press removes human error, and a warning is simpler than a walkthrough. Its advantages — even temperature, even pressure, exact timing — are achievable at home with patience and a proper surface.
What surface should you iron on?
A hard, stable one: a sturdy table protected with a folded towel. A padded ironing board absorbs the pressure the transfer needs to bond.
When do you remove the clear film?
Only after everything has cooled completely. Peeling warm is the most common failure point — the adhesive hasn't set, and lettering can lift away with the film. If your sheet's instructions specify otherwise, the sheet wins.
Get the patches
Keep reading
Argentina After the Final: Completing the 19 July Shirt
uefa badge of honour barcelonaBarcelona's 5: How a Club Earns UEFA's Badge of Honour
barcelona jersey patchesBarcelona 2026-27: Every Patch and Nameset for Your Shirt
champions league patches 2026-27Every Champions League Sleeve Patch for 2026-27, Club by Club
Patch FC sells heat-press patches for personal jersey customization. Ships from the USA.